How to Make………This Gorgeous Laser Cut Invitation
(Literally, it couldn’t be much easier!!)
We absolutely LOVE the current trend for elegant laser cut wedding stationery. We’ve used our gorgeous blank Jaipur Laser Cut invitations in cream to create these gorgeous invitations that we hope will inspire you as much as they inspired us! Although they look amazing on their own, we’ve added a self adhesive pearl detail for an added special touch. Anybody receiving these invitations is bound to be impressed!
If you are new to all this DIY stuff, you might want to shrink away in fear after seeing how beautiful these invitations are. But fear not!!! Even the most amateur of crafters can achieve a really professional finish in a really quick time. Here’s some instructions to help you get started…

For each invitation you will need:
1 Jaipur Laser Cut Invitation in Pearlised Cream. (click here)
1/2 sheet of Pearlised cream paper. (click here)
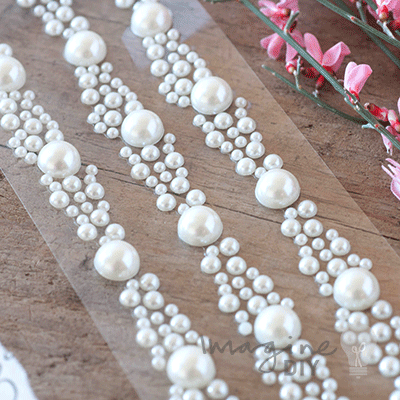
1 Coronet Pearl self adhesive stickers. (click here)
Other things you might need:
Tape runner or double sided tape. (click here)
Paper trimmer
Please take note……our Pearlised card and paper will only print well with a Laser Printer. A laser printer will give you a nice clean professional finish with no smudging. If you haven’t got a laser printer or you can’t beg, borrow or steal one (please don’t literally steal one), you are probably going to need to use an inkjet. If this is the case, we would highly recommend you changing the pearlised cream paper to matt ivory paper to avoid smudging and loss of print quality. Alternatively, visit your local printers and smile nicely!

Instructions
Open up the Jaipur Laser Cut Invitation and place it on a flat surface. Use your tape runner (or double sided tape) to stick the card insert on to the inside of the laser cut panel.
Print your invitation wording on to the A4 sheet of paper and cut down to size using a paper trimmer. You should be able to print 2 copies on each sheet. The finished size of your invitation panel should be 13.5cm x 13.5cm.
Use your tape runner (or double sided tape) to stick the invitation panel on to the inside of the laser cut invitation (on top of the card panel you just stuck in to place)
Fold the top and bottom flap of the laser cut invitation in towards the centre of the card. Turn the card upside down so that the top and bottom flap of the card are held in place underneath the card but the right and left flaps are folded out and facing you.
Choose either the right or left flap. Peel off a Coronet Pearl sticker and starting slightly in from the end of the point, press carefully in to place, following the pattern of the laser cut. Repeat this process on the opposite flap.
Once you are certain that they are both stuck firmly in to place on the card, you can turn it over, fold the left and right flaps in to place over the top and your invitation is finished…….as simply as that!