For some people, making their own wedding invitations is about adding their own personal touch to their special day. For others, it's all about saving money. But by being clever, you don't have to choose between style and budget. This beautiful DIY wedding invitation is not only chic, it's also cheap.
Would you believe it costs less than £1.00 to make?
For Each Invitation You Will Need:
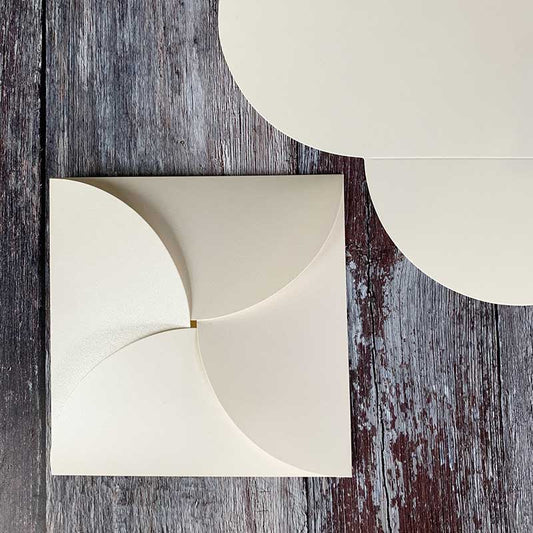
1 x Pearlised Ivory Origami Card (click here)
1/2 sheet of Alessandra Paper in Aqua (click here)
1/2 sheet of Pearlised Ivory Card (click here)
4 x 3mm Self Adhesive Crystals (click here)
32cm x 19mm Satin Ribbon in Nile Blue (1 roll will make appx. 30 invitations) (click here)
55cm x 38mm Satin Ribbon in Nile Blue (1 roll will make appx. 17 invitations) (click here)
Also:
PaperTrimmer (you only need one of these!)
High Tack Double Sided Tape (click here)
TIP – Change the backing paper and/or ribbon to coordinate with your theme.
If you’re not big on reading instructions, we’ve put together a quick video to show you how it’s done (just press play)……
You’ll also need to download this template…..
So Here Are The Instructions……


Instructions
- Download the Templates for the INVITATION Type your wording in to the printable area and print on to the Card.
- Using the guides provided, use your paper trimmer to cut the invitation panels to 10cm x 10cm
- Use the paper trimmer to cut a panel of Alessandra Aqua paper 14cm x 14cm.
- Open up your butterfly card. Use double sided tape to stick the patterned paper onto the inside panel of the butterfly card.
- Use double sided tape to stick the invitation panel on top of the patterned paper. As you do this, make sure that the borders at the top, bottom and either side are even.
- Starting at one corner, peel off one of the self adhesive crystals and press in to place at the corner of the invitation panel. Repeat this process until all the corners have a crystal.
- Starting at the left, fold the flap in towards the centre and hold in place. Fold the bottom flap in towards the centre so that it sits on top of the flap you have just folded. Next fold the flap at the right so that it sits on top of the flap you have just folded. Finally, fold down the top flap. As you fold down this last flap, you will need to lift up the left hand flap (the one you folded first) and tuck the left side of the top flap underneath. You should now have a card that holds itself closed, giving a petal effect.
- Cut off appx. 32cm of 19mm ribbon. Place it on a flat surface and put your invitation on top (roughly in the middle). Place a small piece of double sided tape on one end of the ribbon. Fold both pieces of ribbon in towards the centre of the card, using the double sided tape to stick one end of the ribbon to the other end.
- Cut a length of 38mm ribbon appx. 55cm long. Tie a neat bow. I like to use the bunny ears method to do this (form 2 loops and tie them together). Once you have a bow, tease it in to place by pulling and tightening until you are happy with the size and shape. Once you are happy, cut off the excess ribbon, leaving small tails on either side. It is nice to cut the ends into an inverted "v" shape.
- Place a length of double sided tape across the loops at the back of the bow. Press in to place in the middle of your ribbon band.
- and your done!! You should feel very proud of yourself.