
Make Fun PomPom Wedding Stationery
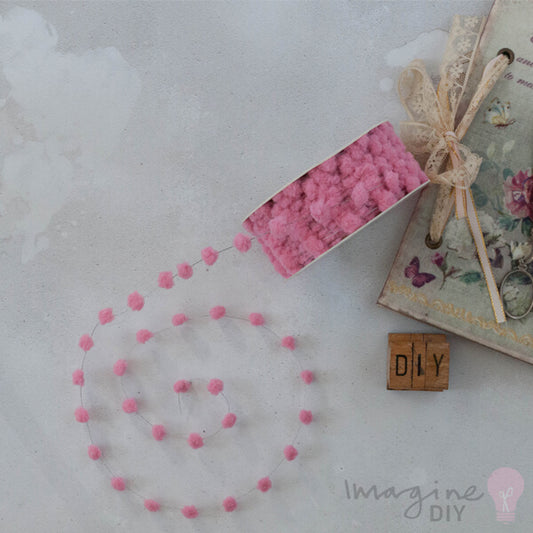
Oh my goodness! We love a pop of colour at the best of times. But when the new Spring Dots cord arrived in stock, it practically designed it's own range! It so much fun you really don't need to do very much to make it look amazing.
This range is perfect for fun loving brides. It shows such a sense of personality and with a range of colours on offer, you can pick and choose the combinations that work best for you.
Why not give it a go?
So Here Are The Instructions……

INVITATION
You Will Need:
20cm of Spring Dots Cord in Rose (click here)
20cm of Spring Dots Cord in Fuchsia (click here)
20cm of Spring Dots Cord in Cream (click here)
1 sheet of Matt Ivory A4 Card (click here)
1/2 sheet of Matt Ivory A4 Paper
You Will Also Need:
Paper Trimmer
Scorer
Tape Runner or Double Sided Tape (click here)
Hot Melt Glue Gun (click here)
And a set of mini alphabet stamps and ink pad
Instructions
- Firstly print your wording on to Matt Ivory Paper and cut down to size. The finished size should be 13.5cm x 13.5cm
- Cut a piece of Matt A4 Ivory Card 29cm x 14.5cm. Score at the centre and fold in half.
- Use your double sided tape to stick the insert to the inside of the folded card.
- Cut a 20cm piece of Spring Dots Cord in Rose. At appx. 1cm down from the top, place a small amount of glue from the glue gun on the crease of the card. Press a pom pom on top of the glue and hold in place until the glue dries. At the opposite side of the card; appx 1/3 of the way down, place another dot of glue and then press the spring dots cord in to place on top of the glue.
- Cut a 20cm piece of Spring Dots Cord in Fuchsia. Glue at the edge of the card where the Rose colour finishes. At the opposite side of the card; appx 2/3 of the way down, place another dot of glue and then press the spring dots cord in to place on top of the glue.
- Cut a 20cm piece of Spring Dots Cord in Cream. Glue at the edge of the card where the Rose colour finishes. At the opposite side of the card; at the bottom, place another dot of glue and then press the spring dots cord in to place on top of the glue.
- Trim any loose ends with a scissors.
- Use your alphabet stamps and ink pad to print "wedding" and "invitation" in between the lines of the Spring Dots cord.
(if you want a quick way around this, you could use a font such as 'My Underwood" and print on to the front of your card instead of hand stamping. You will need to print on to the card before gluing anything in to place).

Evening Invitation
You Will Need:15cm of Spring Dots Cord in Rose (click here)
15cm of Spring Dots Cord in Fuchsia (click here)
15cm of Spring Dots Cord in Cream (click here)
1/2 sheet of Matt Ivory A4 Card (click here)
You Will Also Need:
Paper Trimmer
Hot Melt Glue Gun (click here)
Instructions:
- Firstly print your wording on to Matt Ivory Card and cut down to size. The finished size should be 12cm x 12cm with the wording set to the right side of the card (to leave room for the pompoms). The font "My Underwood" works perfectly for this invitation.
- Cut a 15cm piece of Spring Dots Cord in Fuchsia. At appx. 1cm from the left edge of the card, place a small amount of glue from the glue gun at the top of the card. Press a pom pom on top of the glue and hold in place until the glue dries. At the bottom of the card place another dot of glue and then press the spring dots cord in to place on top of the glue.
- Cut a 15cm piece of Spring Dots Cord in Rose. Place a small amount of glue from the glue gun next to the Fuchsia dots at the top of the card. Press a pom pom on top of the glue and hold in place until the glue dries. At the bottom of the card place another dot of glue and then press the spring dots cord in to place on top of the glue.
- Cut a 15cm piece of Spring Dots Cord in Cream. Place a small amount of glue from the glue gun next to the Rose dots at the top of the card. Press a pom pom on top of the glue and hold in place until the glue dries. At the bottom of the card place another dot of glue and then press the spring dots cord in to place on top of the glue.
- Trim off any loose ends of Spring Dots Cord

Place Card
You Will Need:
10cm of Spring Dots Cord in Rose (click here)
10cm of Spring Dots Cord in Green (click here)
10cm of Spring Dots Cord in Cream (click here)
1/4 sheet of Matt Ivory A4 Card (click here)
You Will Also Need:
Paper Trimmer
Scorer
Tape Runner or Double Sided Tape (click here)
Hot Melt Glue Gun (click here)
And a set of mini alphabet stamps and ink pad
Instructions
- Cut a piece of Matt Ivory Card 10cm x 14cm. Score at the middle and fold in half.
- Use your alphabet stamps and ink pad to print the name on to the centre left of your place card. If you want a quicker way of doing this, you can print on to the place card using the font "My Underwood" .
- Cut a 10cm piece of Spring Dots Cord in Rose. At appx. 1cm from the left edge of the card, place a small amount of glue from the glue gun at the top of the card. Press a pom pom on top of the glue and hold in place until the glue dries. At the bottom of the card place another dot of glue and then press the spring dots cord in to place on top of the glue.
- Cut a 10cm piece of Spring Dots Cord in Green. Place a small amount of glue from the glue gun next to the Fuchsia dots at the top of the card. Press a pom pom on top of the glue and hold in place until the glue dries. At the bottom of the card place another dot of glue and then press the spring dots cord in to place on top of the glue.
- Cut a 10cm piece of Spring Dots Cord in Cream. Place a small amount of glue from the glue gun next to the Rose dots at the top of the card. Press a pom pom on top of the glue and hold in place until the glue dries. At the bottom of the card place another dot of glue and then press the spring dots cord in to place on top of the glue.
- Trim off any loose ends of Spring Dots Cord

SAVE THE DATE CARD
You Will Need:
15cm of Spring Dots Cord in Rose (click here)
15cm of Spring Dots Cord in Anis (click here)
15cm of Spring Dots Cord in Cream (click here)
1/2 sheet of Matt Ivory A4 Card (click here)
1/2 sheet of Matt Ivory A4 Paper
You Will Also Need:
Paper Trimmer
Scorer
Tape Runner or Double Sided Tape (click here)
Hot Melt Glue Gun (click here)
And a set of mini alphabet stamps and ink pad
Instructions
- Firstly print your wording on to Matt Ivory Paper and cut down to size. The finished size should be 9.5cm x 9.5cm (you should be able to fit 4 panels on to an A4 sheet)
- Cut a piece of Matt A4 Ivory Card 10.5cm x 21cm. Score at the centre and fold in half.
- Use your double sided tape to stick the insert to the inside of the folded card.
- Cut a 15cm piece of Spring Dots Cord in Green. At the top of the card, place a small amount of glue from the glue gun on the crease. Press a pom pom on top of the glue and hold in place until the glue dries. At the opposite side of the card; appx 1/3 of the way down, place another dot of glue and then press the spring dots cord in to place on top of the glue.
- Cut a 15cm piece of Spring Dots Cord in Anis. Glue at the edge of the card where the Green colour finishes. At the opposite side of the card; appx 2/3 of the way down, place another dot of glue and then press the spring dots cord in to place on top of the glue.
- Cut a 15cm piece of Spring Dots Cord in Cream. Glue at the edge of the card where the Anis colour finishes. At the opposite side of the card; at the bottom, place another dot of glue and then press the spring dots cord in to place on top of the glue.
- Trim any loose ends with a scissors.
- Use your alphabet stamps and ink pad to print "save" "the" "date" in between the lines of the Spring Dots cord.
(if you want a quick way around this, you could use a font such as 'My Underwood" and print on to the front of your card instead of hand stamping. You will need to print on to the card before gluing anything in to place).

Order of Service
You Will Need:20cm of Spring Dots Cord in Rose (click here)
20cm of Spring Dots Cord in Fuchsia (click here)
20cm of Spring Dots Cord in Cream (click here)
20cm of Spring Dots Cord in Orange (click here)
1 sheet of Matt Ivory A4 Card (click here)
1 or more sheets of Matt Ivory A4 Paper
You Will Also Need:
Paper Trimmer
Scorer
Tape Runner or Double Sided Tape (click here)
Hot Melt Glue Gun (click here)
And a set of mini alphabet stamps and ink pad
A long arm stapler
Instructions
- Cut your pearlised matt ivory card to 21cm x 29cm. Score and fold in half. This will form your order of service cover.
- Cut a 20cm piece of Spring Dots Cord in red. At the top, place a small amount of glue from the glue gun on the crease of the card. Press a pom pom on top of the glue and hold in place until the glue dries. At the opposite side of the card; appx 1/4 of the way down, place another dot of glue and then press the spring dots cord in to place on top of the glue.
- Cut a 20cm piece of Spring Dots Cord in Fuchsia. Glue at the edge of the card where the Red colour finishes. At the opposite side of the card; appx 1/2 of the way down, place another dot of glue and then press the spring dots cord in to place on top of the glue.
- Cut a 20cm piece of Spring Dots Cord in Cream. Glue at the edge of the card where the Fuchsia colour finishes. At the opposite side of the card; appx 2/4 of the way down, place another dot of glue and then press the spring dots cord in to place on top of the glue.
- Cut a 20cm piece of Spring Dots Cord in Orange. Glue at the edge of the card where the Cream colour finishes. At the opposite side of the card; at the bottom, place another dot of glue and then press the spring dots cord in to place on top of the glue.
- Trim any loose ends with a scissors.
- Use your alphabet stamps and ink pad to print "order" "of" "service" in between the lines of the Spring Dots cord.
(if you want a quick way around this, you could use a font such as 'My Underwood" and print on to the front of your card instead of hand stamping. You will need to print on to the card before gluing anything in to place). - Print your order of service wording on to A4 paper and cut to size. The finished size should be 20cm x 28cm. Fold in half and use a long arm stapler to secure the wording to the inside of the cover. Do this carefully to make sure that the staples sit along the crease.